How to Cook Juicy Chicken Breast Every Time
Unlock the secrets to cooking perfectly juicy chicken breast every single time with our foolproof techniques. Say goodbye to dry, bland chicken and hello to tender, succulent bites bursting with flavor. This post will guide you through step-by-step instructions, from choosing the right cut of chicken to nailing the cooking time and temperature. Elevate your culinary skills and impress your family and friends with your newfound ability to cook juicy chicken like a pro.

This post contains links to affiliate websites, such as Amazon, and we receive an affiliate commission for any purchases made by you using these links. We appreciate your support!
Why Cook with Chicken Breast?
Chicken breast is not only a delicious and versatile protein but also offers an array of nutritional benefits that make it a valuable addition to a healthy diet. Packed with high-quality protein, chicken breast provides essential amino acids necessary for muscle growth, repair, and maintenance. It is also a low-fat option, particularly when the skin is removed, making it ideal for those seeking to manage their weight or reduce saturated fat intake.
Additionally, chicken breast contains important vitamins and minerals such as vitamin B6, niacin, phosphorus, and selenium, which support various bodily functions, including metabolism, immune function, and bone health. Incorporating chicken breast into your meals can provide a lean and nutrient-dense protein source that promotes overall well-being and helps you maintain a balanced and nutritious diet.
Common Mistakes When Cooking Chicken Breasts
Cooking chicken can sometimes be a challenge, and there are a few common mistakes that people often make. By being aware of these mistakes, you can improve your chicken cooking skills and ensure delicious and safe results.
Here are two common mistakes to avoid when cooking chicken:
Overcooking or Undercooking Chicken Breasts
One of the most prevalent mistakes is overcooking chicken, which can result in dry and tough meat. The alternative of undercooking may be less common but is a food safety issue.
It’s important to cook the chicken to the recommended internal temperature, which is 165°F (74°C) for chicken breasts and 175°F (79°C) for dark meat. Using a meat thermometer is an excellent way to ensure accuracy and prevent overcooking. Remove the chicken from heat as soon as it reaches the proper temperature and let it rest for a few minutes to allow the juices to redistribute, resulting in moist and tender meat.
Not Properly Seasoning Chicken
Chicken has a mild flavor on its own, so it’s crucial to season it properly to enhance its taste and texture. Many people overlook the importance of seasoning chicken adequately before cooking. Be generous with salt, pepper, and other spices or herbs of your choice to infuse the chicken with flavor. Consider using marinades or dry rubs to add extra depth and complexity.
Tools Needed To Cook Juicy Chicken Breasts
Besides a pan, there are really only two tools you need to cook a juicy chicken breast:
- The single most important tool for cooking chicken breasts perfectly every time is an Instant read probe thermometer. If all you do is bake, grill, or pan-sear a chicken breast until it reaches 155°F internal temperature, your chicken is going to be juicy and delicious.
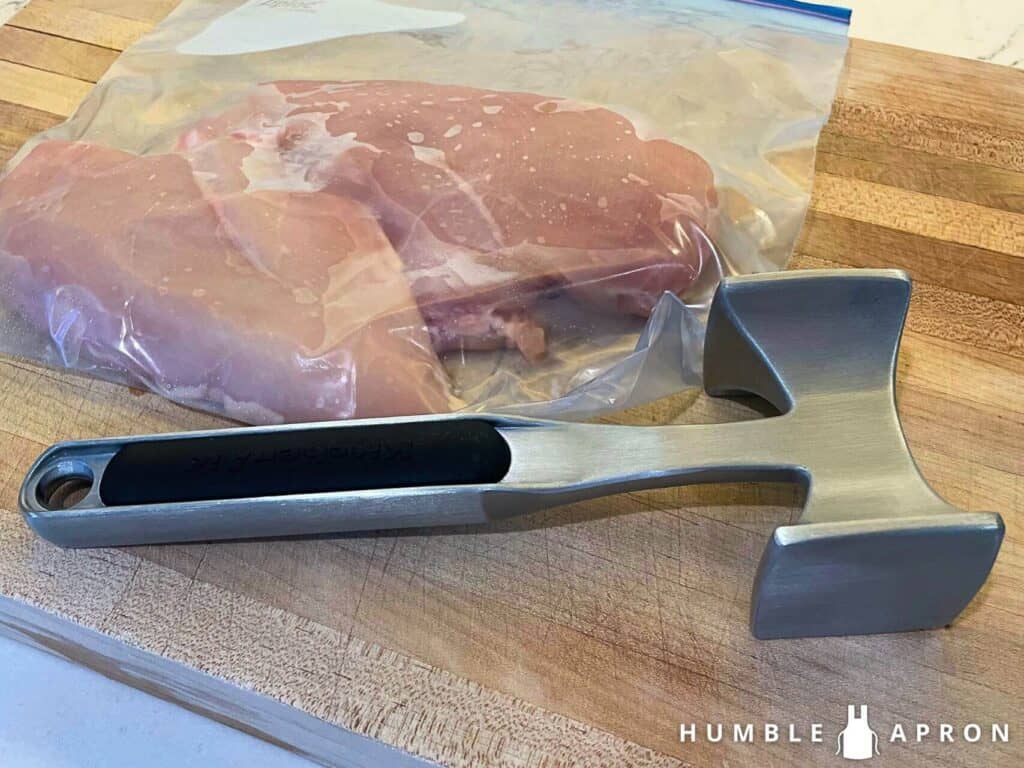
- The second most important tool is a meat mallet. Getting the chicken breast to an even thickness helps ensure that the doneness is even across the meat as opposed to overdone where it is thin and underdone in the middle.
How to Cook Juicy Chicken Breast
With the proper tools and technique, we can take this versatile, lean protein, and eliminate the mistakes that produce poor results. You will never again as, “how long do you saute chicken?” because you will know how to determine that your chicken is completely cooked!
Here is the technique for cooking a juicy chicken breast:
Flatten the Chicken to be Uniform
Do you need a meat mallet to flatten meat? No, your fist, a pan, a rolling pin, or a cutting board can all be used to produce flat chicken breasts. A meat mallet gives you greater control over producing even thickness and reduces the risk of damaging your fist, or countertop.
I always place my chicken breasts in a sealable plastic bag, and place that on a large cutting board before hammering away. This keeps any raw chicken juice contained for a safer food prep space. Some meat mallets come with a flat and a waffle side, I use the flat side to prevent the bag from being damaged.
Start by placing the chicken smooth side up and feel the thickness with your hand. The goal is to pound the thickest part of the chicken gently until an even thickness is achieved across both pieces of meat. This will ensure each breast cooks evenly but also requires the same amount of cooking time between each individual piece.
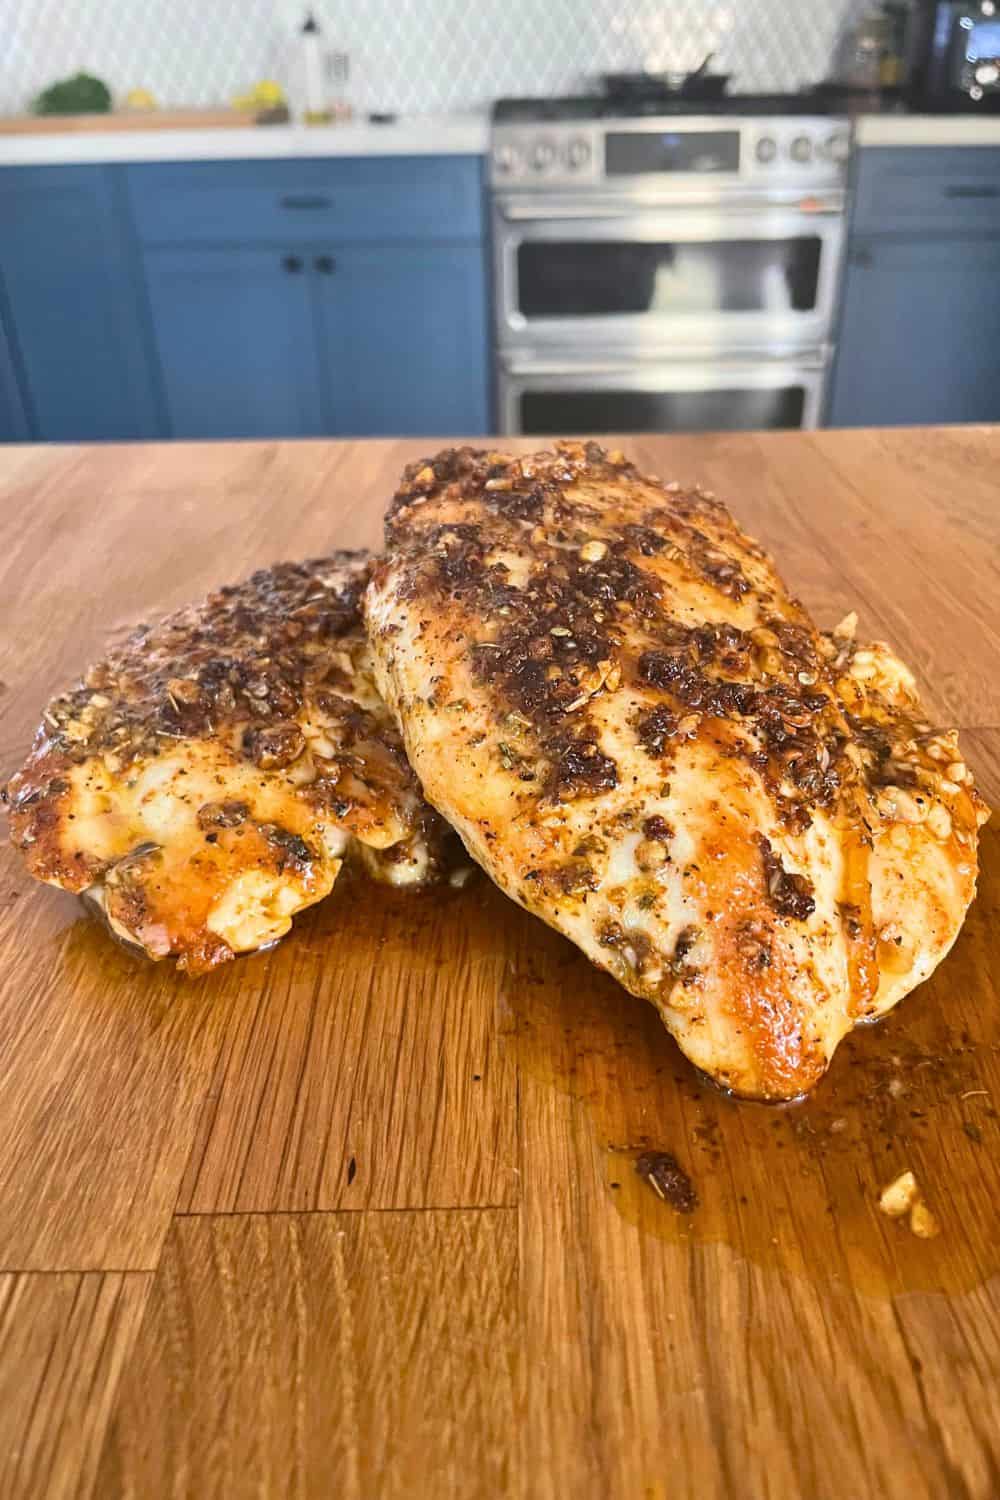
Season Liberally with salt
Season one side of the chicken liberally with salt. I season the smooth side and when I sear it, I begin by searing the smooth side as well. At this point, we can add certain other spices like cracked black pepper. But don’t add any herbs that will burn and add a bad flavor to your chicken. Save those for the latter half of cooking the chicken.
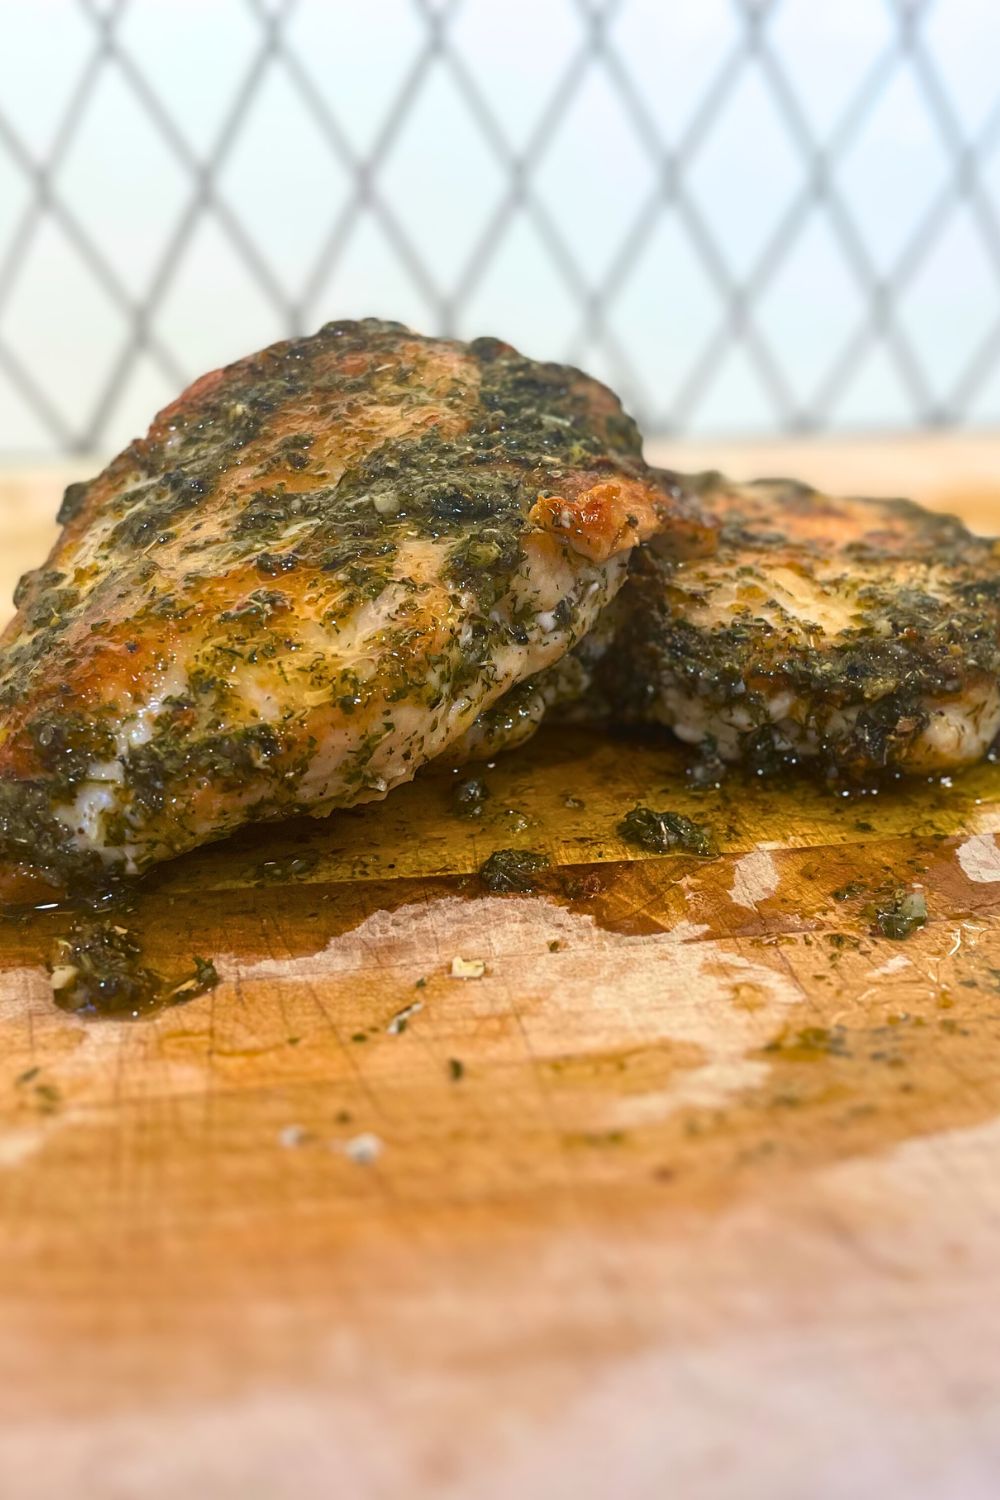
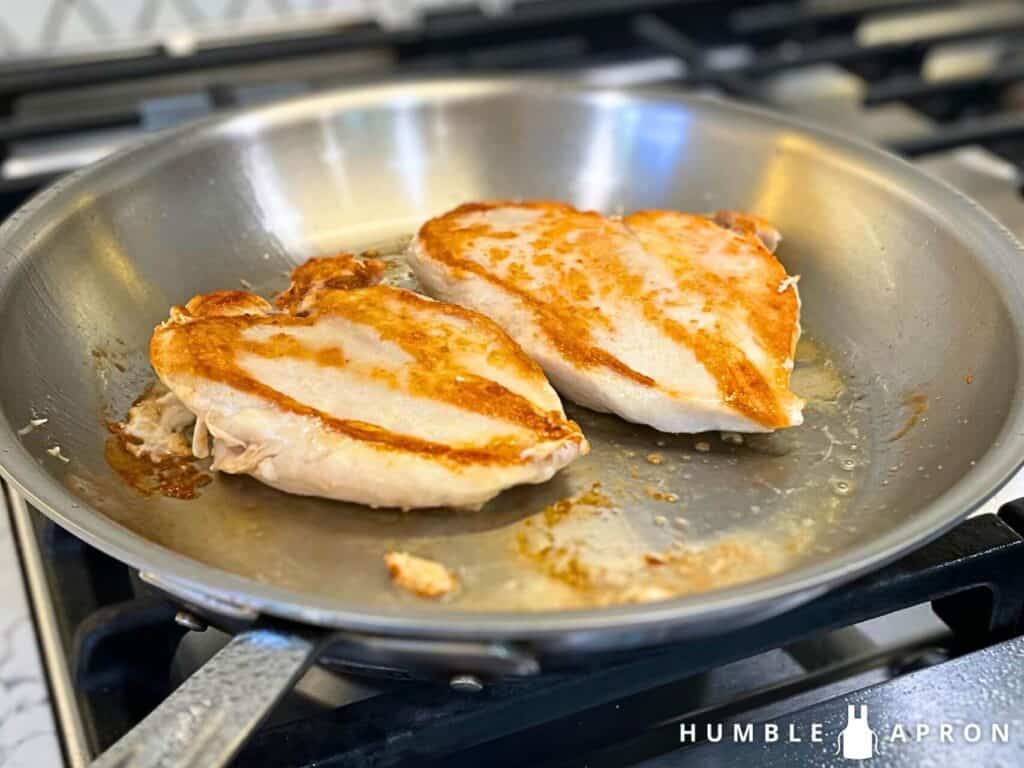
Sear Chicken in a Hot Pan
My preferred method for cooking juicy chicken breasts is pan-seared in a hot pan. Grilling or baking can also be great options.
When you pan-sear your chicken you will develop a crust that gives really great texture to your meat, but also serves to lock in the juices preventing them from drying out. Make sure and choose a high smoke point cooking fat, in this instance, I have a high preference towards clarified butter, also known as Ghee and I explain the benefits in great detail below.
After your chicken has developed a crust on one side, make sure you have sufficient fat in your pan and flip the chicken to sear on the other side. After a few minutes, it’s time to start monitoring your internal temperature. I have found that chicken continues to cook even after it’s removed from the pan. While it’s recommended to achieve an internal temperature of 165°F, I have found that my chicken turns out juicier and is still safe when I remove it at 155°F internal temperature.
Deglaze the Pan and Use the Fond
What is Fond? Fond is the caramelized bits left in the bottom of a pan after you’ve browned the meat. The browned bits left over in your pan are amazingly flavorful. You can unlock them by deglazing your pan with broth, wine, or even lemon juice.
Over medium heat add some aromatics like garlic, thyme, oregano, or shallots to your pan for a minute or two until fragrant. Now add your wine or broth and scrape the fond from the bottom of the pan with a wooden tool. White wine works great, chicken broth can also be served. Let this simmer for a few minutes and reduce, really extracting the flavor from the fond and the aromatics you added.
Lastly, let’s add a tablespoon of butter to your pan and mix until the sauce has thickened.
Common Questions about Cooking Juicy Chicken
When cooking juicy chicken, I see these questions and issues come up over and over again.
How Hot Should My Pan Be?
I shoot for medium-high heat, but that’s ambiguous because my stove is most certainly different from your stove. Heat your pan and oil until it shimmers. Now add your chicken, you should achieve a nice brown sear in 5-7 minutes. If it takes longer than 7 minutes, your temperature is too low.
If at any point your oil begins to smoke, turn down the temperature and remove the pan from direct heat until it’s no longer smoking. In an ideal situation, we are heating the pan and the oil up to just before it smokes. This is going to give your chicken the best sear and prevent it from cooking too long to achieve a satisfactory internal temperature.
Why Should I Cook with Ghee?
Here are five reasons why you should consider cooking with Ghee:
- High smoke point: Ghee has a high smoke point of around 450°F (232°C) or higher, depending on its quality. This means it can withstand high heat without burning or breaking down into harmful compounds. Using ghee for high-temperature cooking methods like frying, sautéing, and roasting is preferable over oils with lower smoke points, as it prevents the release of harmful smoke and maintains its nutritional integrity.
- Rich flavor: Ghee has a rich, nutty flavor that enhances the taste of food. Its unique taste can complement a wide variety of dishes, making them more enjoyable.
- Long shelf life: Due to its low water content and lack of milk solids, ghee has a longer shelf life than regular butter. It can be stored at room temperature for several months without spoiling, which makes it convenient for regular use in cooking.
- Lactose and casein removal: Ghee is clarified butter, meaning it has had the milk solids and water removed through heating and straining. As a result, lactose (milk sugar) and casein (milk protein) are nearly eliminated, making ghee a suitable option for individuals with lactose intolerance or milk allergies.
- Nutritional benefits: Ghee contains essential fatty acids, including Omega-3 and Omega-9, as well as fat-soluble vitamins like A, D, E, and K. These nutrients are beneficial for various bodily functions, such as brain health, immune system support, and hormone regulation.
However, it’s important to remember that ghee, like any fat, is high in calories, so it should be used in moderation as part of a balanced diet. Additionally, while ghee is suitable for many people, those with specific dietary restrictions or health conditions should consult with a healthcare professional or a registered dietitian before incorporating it into their diet.
When Should I Season the Chicken?
I really appreciate seasoning my chicken during the last 10-15 degrees of internal temperature. If you add some marinade, or other seasoning to the chicken when it’s at 140°F internal temperature, your seasonings will have time to release their aromatic properties but reduce the chances of them burning in the hot pan. Things like garlic, lemon juice, or dried herbs and spices added at the correct time can really elevate a juicy chicken breast.
How Do I Make Sure I Don’t Overcook the Chicken?
So, how long do you saute chicken? The answer is to check the chicken with a kitchen thermometer. Remove the chicken when it reaches 155°F internal temperature and let it rest on a cutting board for several minutes.
What Did We Learn About Cooking Juicy Chicken Breasts?
Chicken Breasts are possibly the best lean source of protein. With the application of a little technique and timing, it’s possible to enjoy the nutritional benefits at home while avoiding the common problems that result in tasteless, tough, or rubbery, unappetizing chicken breasts. And lastly, practice makes perfect. Implement some of the principles we looked at today and learn from your results.